Hello guys, Today I am going to share you the best way to use one of the best makeup photo editor for windows and this software is very useful for photography. So guys, I am Mr. Pankaj Let's start.
The best software that can helps you to edit your photos and make up your photos very easily and this is a very simple interfaced software so don't worry about using it. I will show you all the steps how to use this software in your Windows computer and this software is very light weighted, and I think this software runs on every Windows computer and even on the low-end PCs. If you want to use this software with full of features, you can buy it from their official website. CyberLink Makeup Director 2 is decent software, and it is best for the photographer and artist who used to edit and wants to make up their photos in very small amount of time, so guys without wasting any time let's talk about how to use makeup director to in your PC and kindly follow all the steps to use this software properly on your Windows computer.
Here are all the way to use Makeup Director 2 in your PC:-
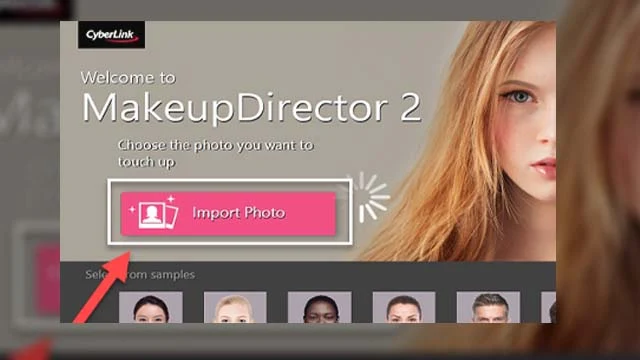
1. In the first step, open the software in your computer. Now according to the given picture click on the import photo to import your photo that you want to make up.
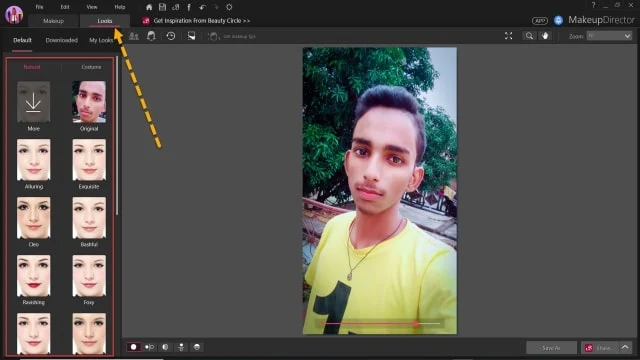
3. The second tab is the Looks tab, in this tab you can apply the preset that are already given in the software, and you can also apply your customized presets on your photo, there is no need to make up your photo. The all presets are already adjusted so simply click to apply on your photo.
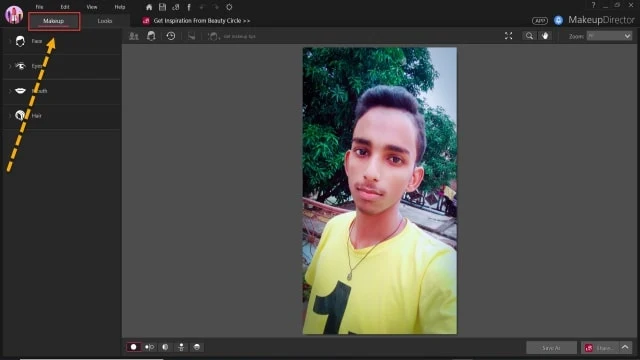
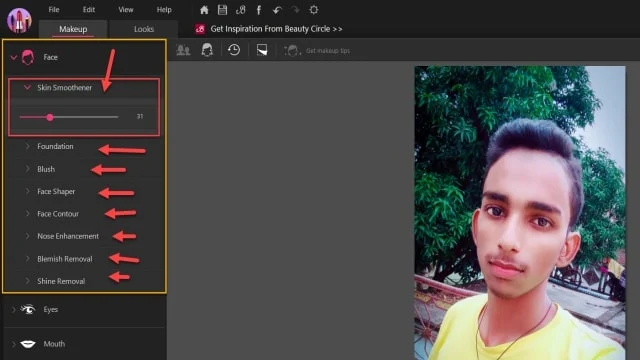
4. Now we talk about the first step that is makeup tab and in this tab, you will find a lot of things that can be adjusted on your face. It is very simple to customize. The first option is the Face Adjustment and here in this option you can adjust a lot of things like Skin Smoother, Foundation, Blush, Face Shaper, Face Counter, Nose Enhancement, Blemish Remover & Shine Removal you can adjust these all things according to your need. For example, I have applied skin smoother to 31% on my photo.
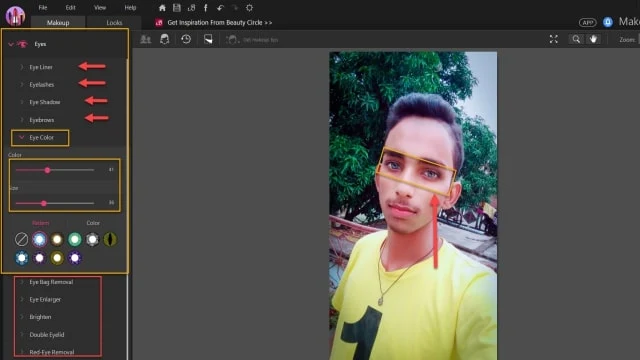
5. Here in the second option Eyes Adjustment is given you can customize and change your eye color and adjust the things like Eyeliner, Eye Shadow, Eye Color, Red Eye Remover etc. Now you can see in the given image I have changed my eye color by simply choosing the eye color, and you can adjust all the option likewise.
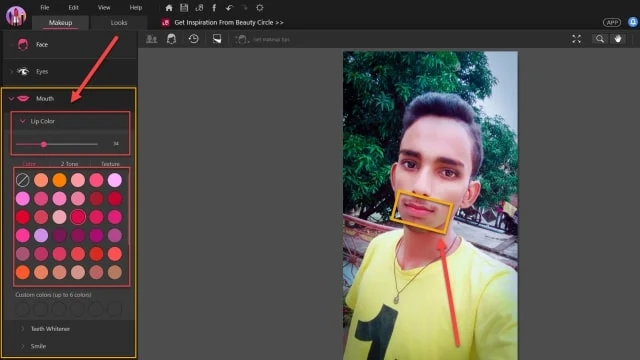
6. Now in the third option that is Mouth Adjustment and here in this option you can adjust your Lip Color, Teeth Whiteness and Smile for example I have to change my lip color and according to your photo you can adjust the percentage of applying this effect.
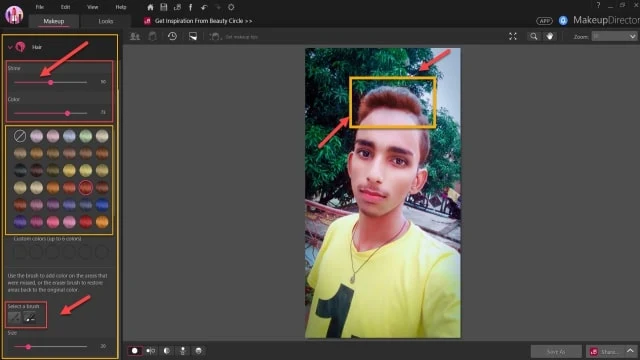
7. The fourth option is Hair Adjustment and in this option you can adjust the color of your hair. You can see in the given picture I have change my hair color from black to Brown and you can adjust the percentage of applying the color and opacity. At the bottom you can see the brushes are given where you can brush over your hair and apply these effect.
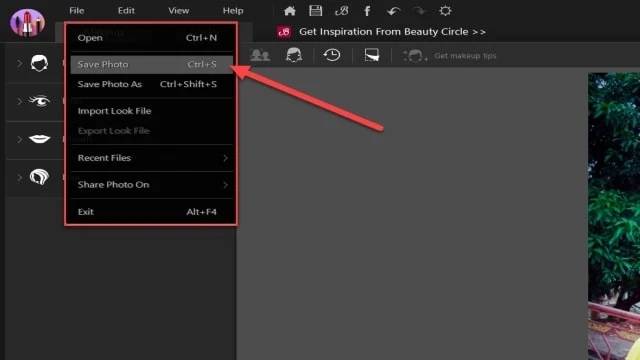
8. After the full makeup of your photo you can go to the file tab and click to save the photo. You can also click on save photo as to save your photo customize format.
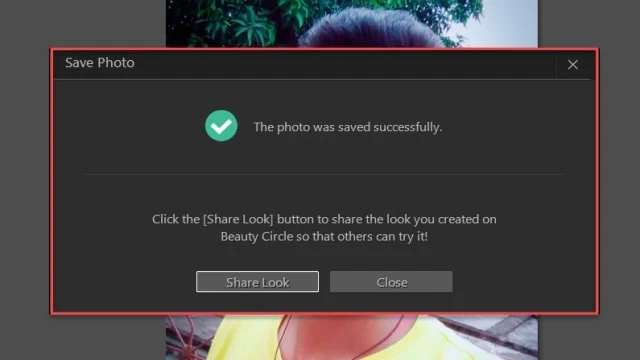
9. Now that's it. Your photo has been successfully saved. Now you can share the look by clicking on the share look button that you have created by applying different types of effects on your photo and after sharing your look for the next time if you import any photo you can apply your previous saved look on your photo without any adjustment on your photo.
So guys, hopefully this post helps you. If you have any problem regarding this post, you can ask your questions in the comment box, and you can also contact us for any other help.

Post a Comment
Please do not enter any spam link or any unwanted messages in the comment box.